Fabulous Info About How To Draw A Table In Word

Creating A Table In Word - Youtube

Insert A Table In Word For Mac
How To Draw Table In Ms Word - Youtube

How To Insert A Table In Microsoft Word Document: 3 Steps
![4. Tables, Graphics, And Charts - Office 2013: The Missing Manual [Book]](https://www.oreilly.com/library/view/office-2013-the/9781449359416/httpatomoreillycomsourceoreillyimages1671845.png.jpg)
4. Tables, Graphics, And Charts - Office 2013: The Missing Manual [book]
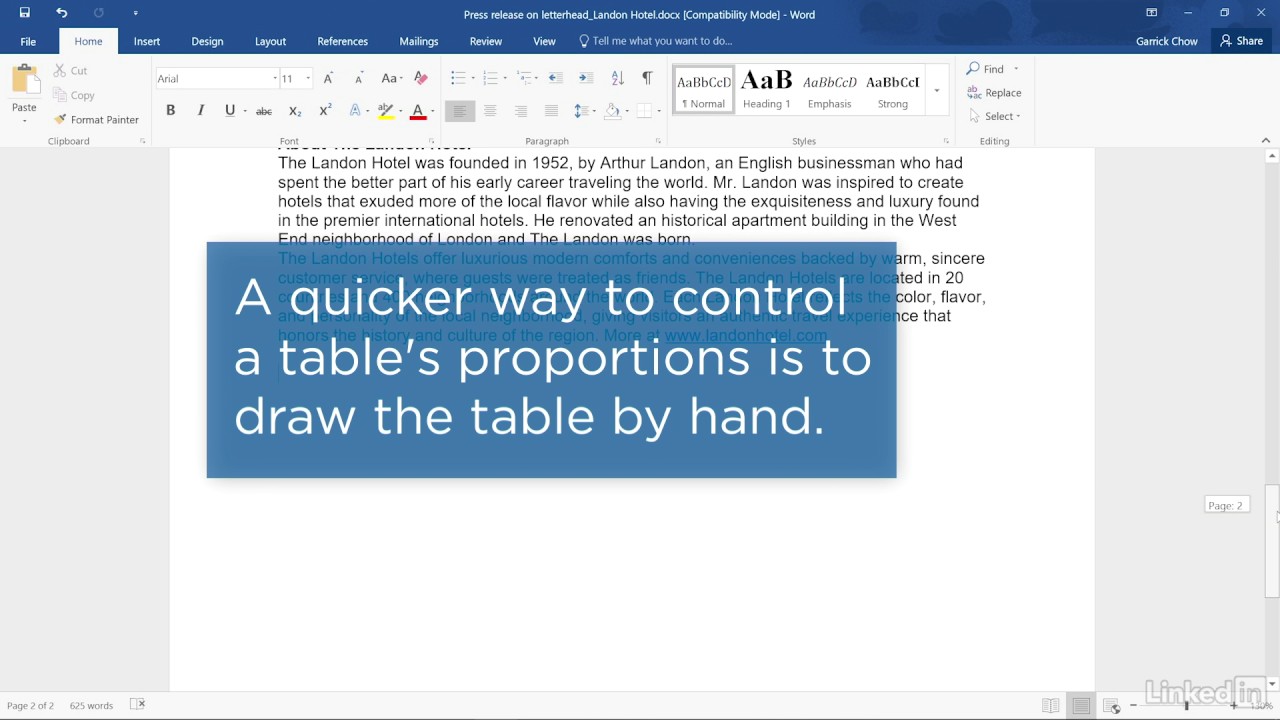
This video shows how to manually draw a table in microsoft word.
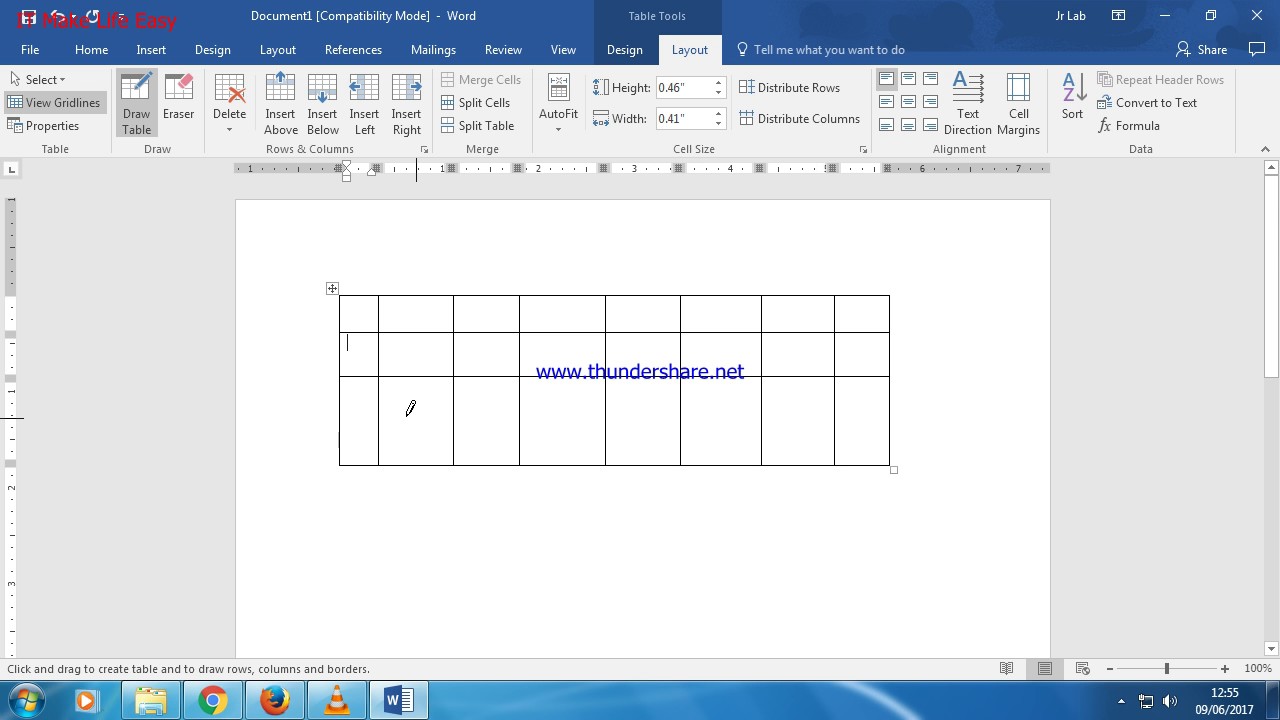
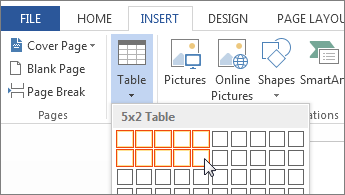
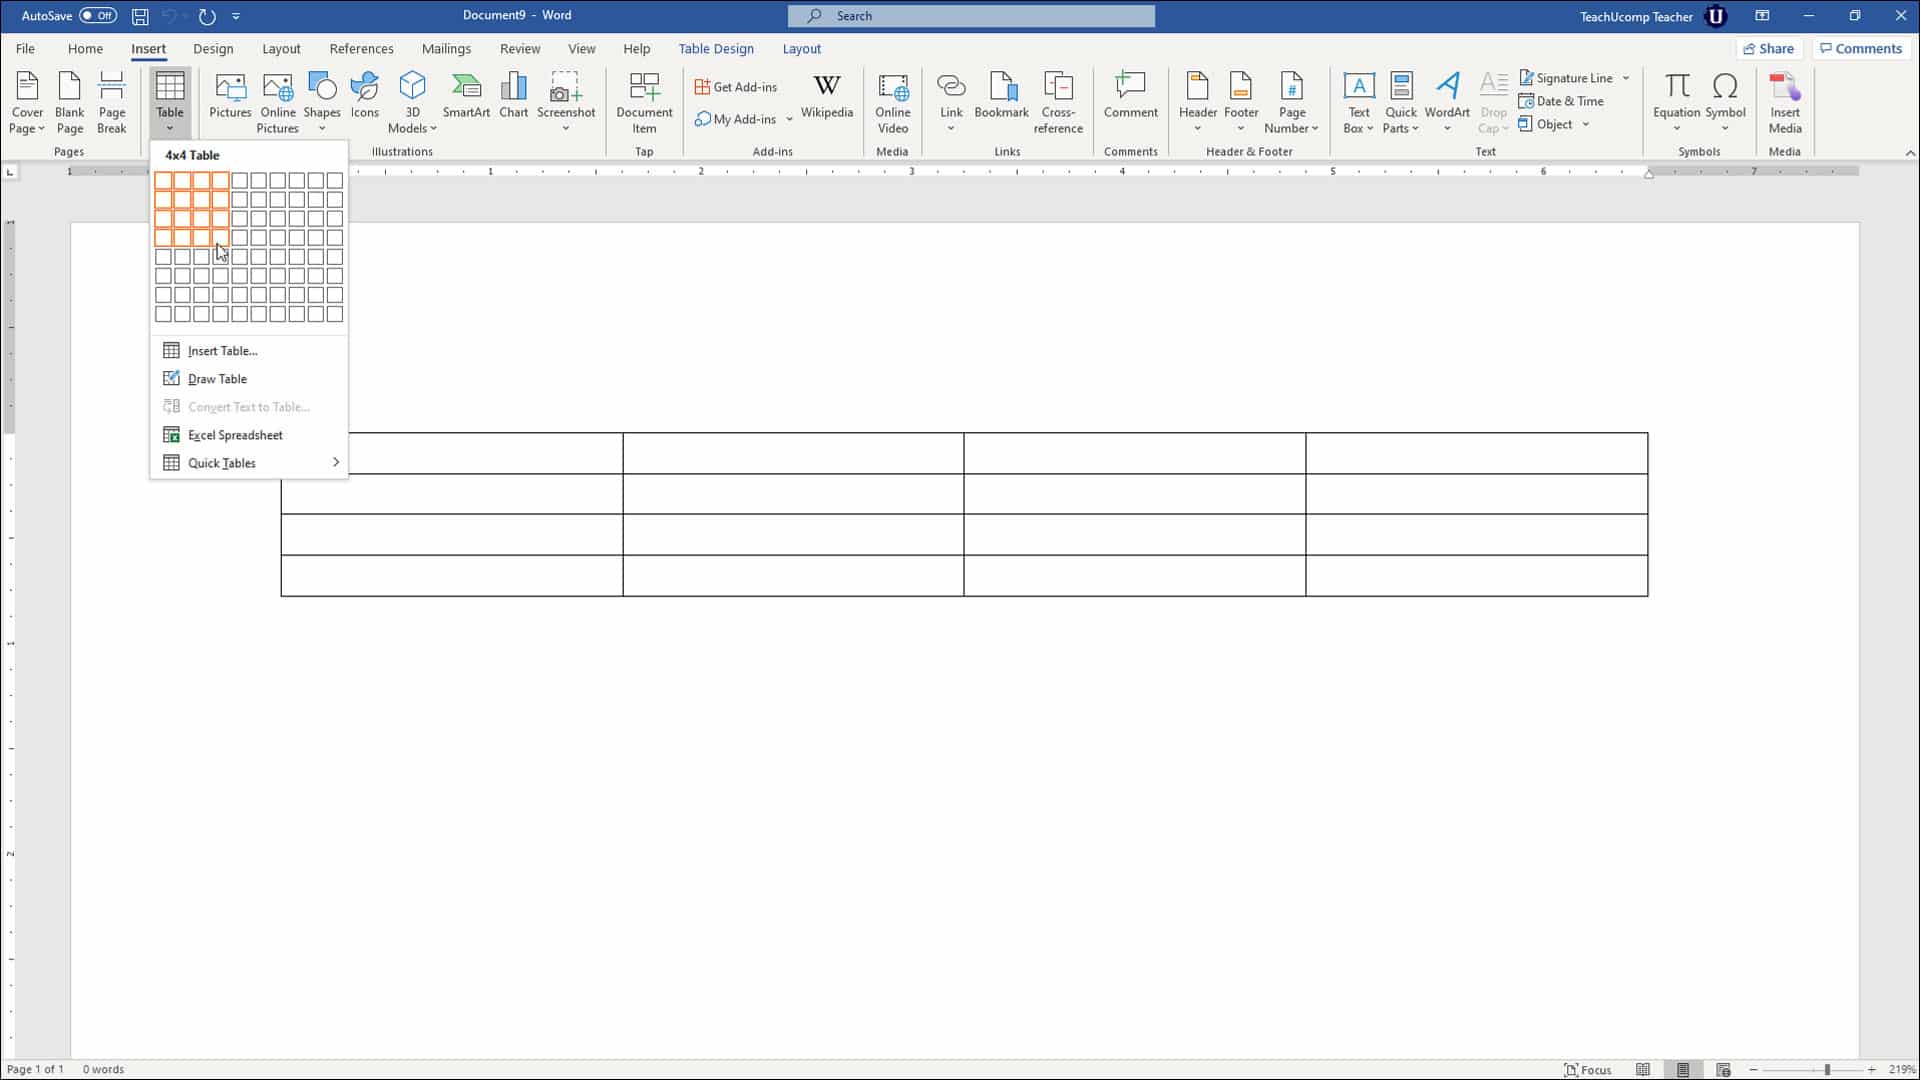
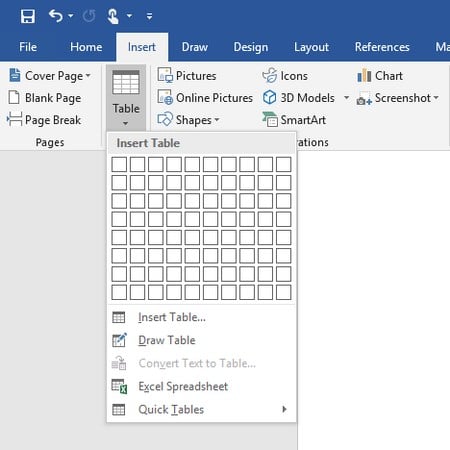
How to draw a table in word. The draw table function is offered in microsoft word on both windows and also mac. Then click the “table” button in the “tables” button group. To quickly insert a table:
Then select your preferred border line. Select insert > table and move the cursor over. It works similarly and allows you to create a table specifically as.
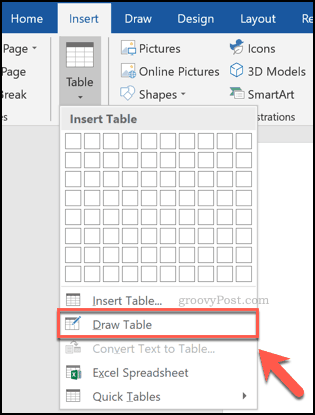
Navigate to the references tab on the ribbon, then click the table of contents command. Here's how to draw a table: To draw your own table, select insert > table > draw table.
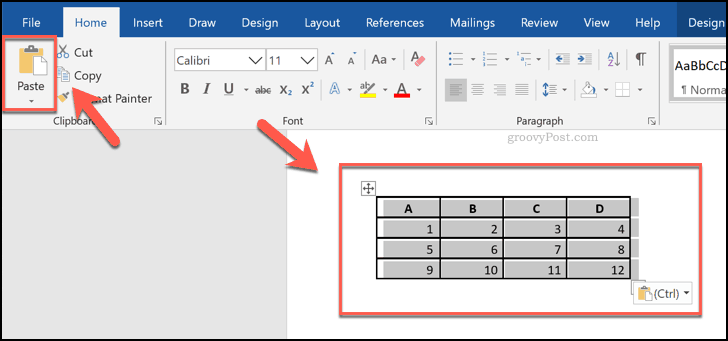
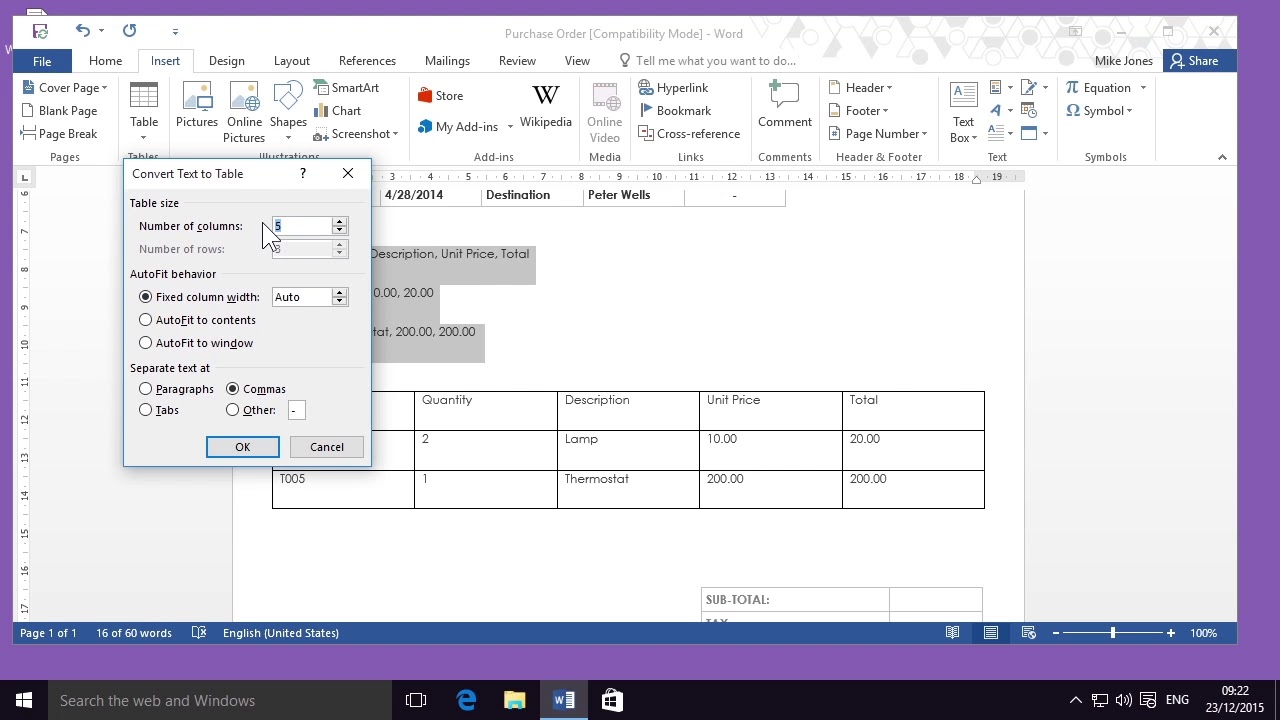
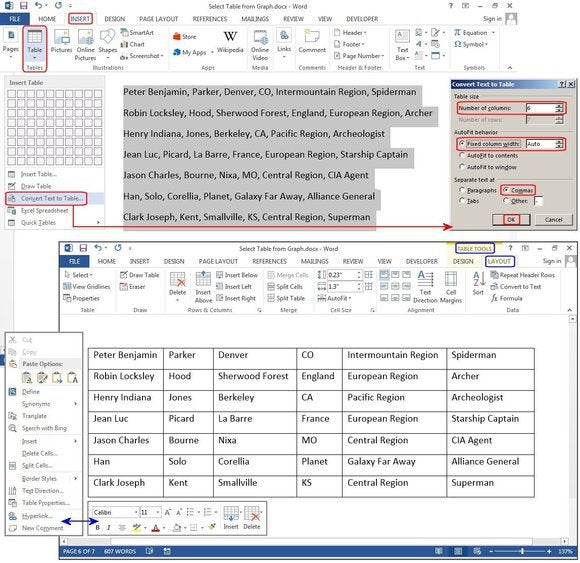
Then select the “draw table” command from the drop. Draw table, insert a new or existing. Select insert > table, and then select convert text to table.
Separate the text you want to convert to a table with paragraphs, commas, tabs, or a special character. Click the table you want to split. Use lines to draw on a word document.
It works the same way and allows you to create a table exactly as you want. Select table from the menu bar. To resolve this behavior, insert the shapes and connector in a new drawing canvas.
Place your cursor where you would like to start your word drawing and click. Draw a table in word. Don’t worry about the exact dimensions;
This will reveal two new tabs above the toolbar ribbon at the top of your document: The draw table feature is available in microsoft word on both windows and mac. Click “options” at the bottom of the cell tab.
Select insert > table, and then select convert text to table. You can modify it any. The cursor turns into a pencil, which you drag down and across to draw a box.
To draw a table in word, click the “insert” tab in the ribbon. Once you've applied heading styles, you can insert your table of contents in just a few clicks. On the table properties dialog box, click the “cell” tab, if it’s not already active.

How To Draw A Custom Table In Microsoft Word

Video: How To Hand-draw Your Tables In Word (it's Pretty Cool)
Video: Insert A Table
Create Tables In Word - Instructions Teachucomp, Inc.

How To Quickly Make & Edit Microsoft Ms Word Table Designs

How To Draw A Custom Table In Microsoft Word
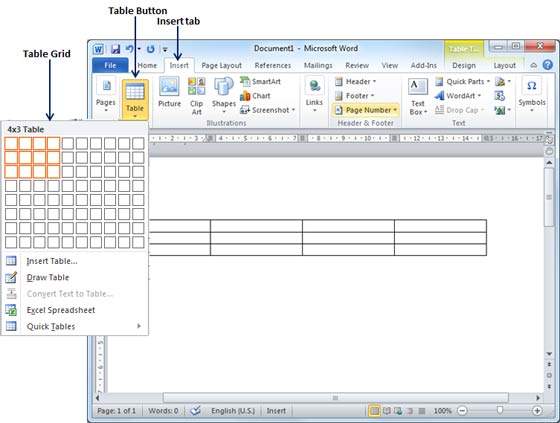
Create A Table In Word 2010

How To Quickly Make & Edit Microsoft Ms Word Table Designs
Word Tutorial - Draw A Table Youtube

How To Quickly Make & Edit Microsoft Ms Word Table Designs
How To Create And Customize Tables In Microsoft Word
How To Create And Customize Tables In Microsoft Word | Pcworld
Creating And Formatting Tables In Word 2019 - Dummies